Step1:
Ensure that brandering (38mm x 38mm battens) are fixed onto main trusses approximately 400mm apart and that it is lined up completely level.
Step2:
Make use of the right insulation for your room. This will make the room more comfortable for you as well as extend the lifespan of your ceiling.
Step3:
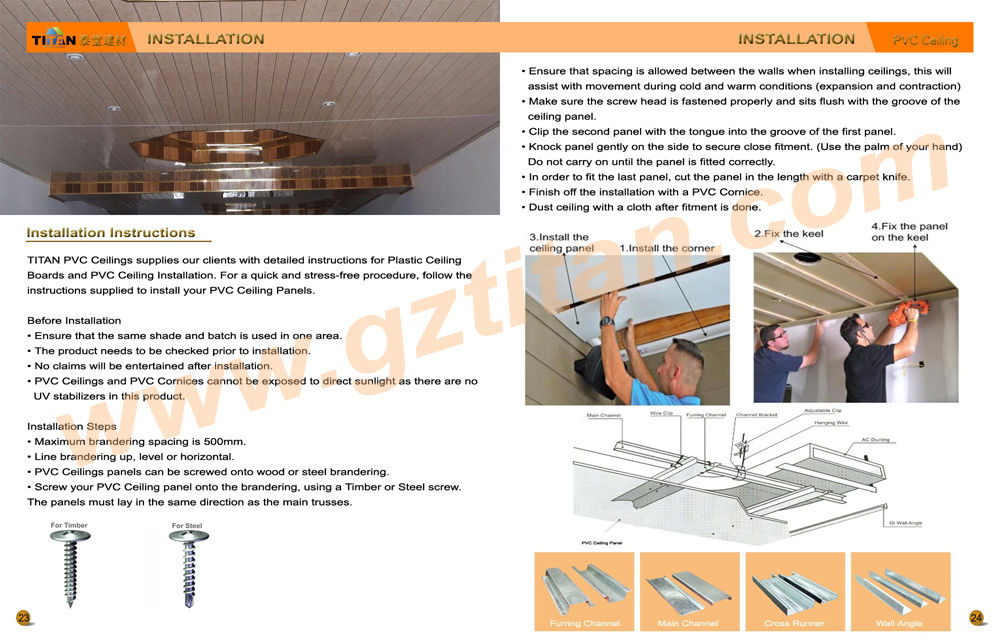
Mitre and screw PVC Cornices onto brandering along the perimeter of the room/area. (Do not use nails or staples as these can pull loose where screws are more secure)
Step4:
Keeping in mind that the ceilings panels should run in the opposite direction of your brandering. Slot the ceiling panel into the PVC Cornice tongue side first leaving the groove side exposed as you will need to screw through there into your brandering to secure the panel (screw on every batten along the panel).
Step5:
Clip the second panel with the tongue into the groove of the first panel to conceal the screws. Knock the side of the panel slightly with the palm of your hand to secure close fitment then screw into the groove of the second panel to fix to the brandering.
Step6:
Continue this process till the last panel fit into the cornice at the end of the room. Lastly, seal of all the corners and mitres with silicone and clean the ceiling with a damp cloth if needed.


 QQ
QQ ALIBABA
 Skype
Skype E-mail
 13724122257
 13724122257